Forfunly crochet guides
How to Fix Gaps in Amigurumi: Find the Cause First
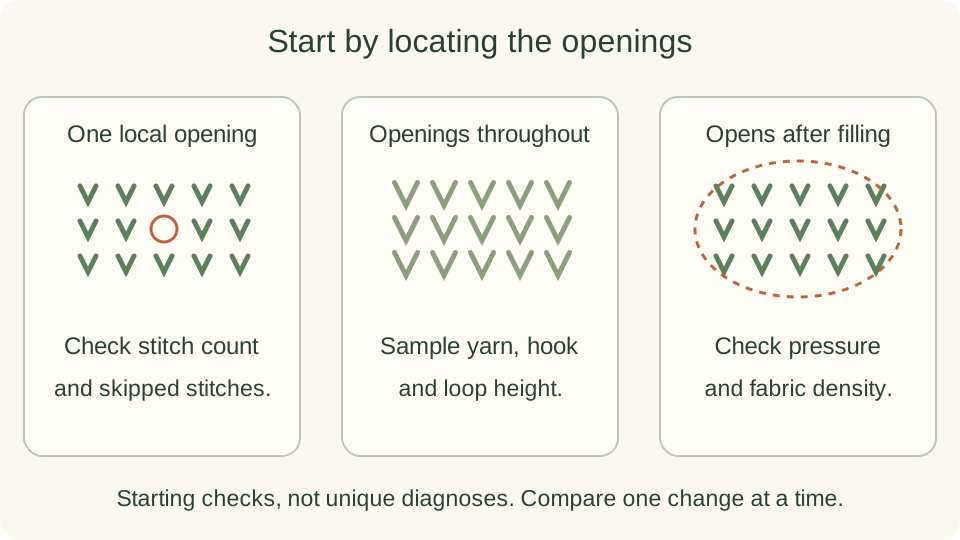
Amigurumi holes have different causes. A gap at a decrease needs a different check from filling visible across the whole body. Identify where the opening appears and when it becomes visible, then change one thing at a time.
Illustrations updated
What should you check first?
First, locate the gap and check the stitch count. Then check one possible cause at a time: loose loops, the yarn and hook, stuffing, decreases or the starting ring. A smaller hook may help with loose fabric. It will not fix a missed stitch or guarantee a gap-free result.
Find out whether the gap is local or widespread
Examine the piece before adding stuffing. Is there one opening, a line at the round start, holes at decreases or space between most stitches? Note whether it appeared during crocheting or only after filling.
Count the round and inspect nearby stitches. A skipped stitch, an accidental chain or inserting into the wrong space can create a structural hole. Undo to the mistake and rework it; tightening neighboring yarn does not restore a missing stitch.
Check the loops you make on the hook
If some stitches are much larger than others, watch the height of each pulled-up loop. Let the loops sit on the hook shaft, then complete the stitch without stretching the working yarn upward. Keep a steady grip rather than squeezing tighter with every stitch.
Practice a few rounds at a comfortable pace and compare them with the earlier section. Pulling excessively hard may make the hook difficult to insert and strain your hands. Pause if uncomfortable, then resume with an easier grip and a sample you can inspect.
Compare the yarn and hook with the pattern
If openings appear evenly across the fabric, check the actual yarn and hook against the pattern’s recommendations. A broad yarn-weight category does not guarantee the same thickness or construction. A substitute yarn may need a new sample even when the label number matches.
Try one hook change on a separate sample, then compare density, size and ease of working. A smaller hook can reduce some spaces but can also create stiff fabric or difficult stitches. Keep the useful sample and record what changed instead of altering several variables together.
Reduce stretching from filling
Did the gaps appear after stuffing? Remove a little filling and spread the rest evenly. Use small pieces instead of one hard lump. Check whether the shape holds without stretching the stitches.
Follow the pattern’s guidance on firmness. More filling will not fix an uneven seam or a count error. If gaps remain, inspect the fabric without stuffing. The pressure may reveal a problem that was already there.
Inspect gaps concentrated at decreases
Confirm that each decrease uses the intended two stitches. For standard sc2tog, keep both pulled-up loops at a consistent height before drawing through all three loops. An overly long loop can leave a larger opening at that point.
If the pattern allows it, practice an invisible decrease for standard right-side-out amigurumi. It works through the front loops of two neighboring stitches and can make the change less noticeable. Do not substitute it automatically where the pattern requires another texture or construction.
Treat the starting hole separately
For a magic ring, check that the first stitches surround the adjustable loop and tail, then gently draw the center closed. Secure the tail using the pattern’s finishing instructions so it does not simply slide open again. If the start uses chains instead, follow that method’s own closure guidance.
Find your next crochet design
Choose a project to make or a finished piece to buy. Check the selected option before ordering.
- Crochet Gauge, Hook Size and Yarn: A Beginner Guide
- Learn with a US single crochet practice square
- Ask about a product’s contents or instructions
Before ordering, read the current shipping and returns information.
Further learning
For stitch names, see the Craft Yarn Council crochet abbreviations. For difficulty, see its project skill levels. Follow the pattern for your project. Check the product page for what you will receive.
Explore all crochet guides →